Oracle Supplier Portal
Dear Valued Partner,
To begin, navigate to oraclesupplier.philasd.org. You see numbered train stops along the top of the page. Each train stop represents a section of the registration process you need to complete.

For the best results, please take note of the following tips:
- This website works best in Google Chrome or Mozilla Firefox
- Only use the navigation buttons (Back and Next) inside the portal when moving through the registration process. Using your browser’s back button will exit you from the portal.
- Note that a blue asterisk (*) appears next to fields that are required.
- At any point during the registration process, you can select “Save for Later” to complete the registration at another time.
- Your registration request is not submitted until you select “Register” at the end of the process.
If you have questions, please email oraclesupplier@philasd.org or attend our Supplier Office Hours on Tuesdays from 3:30pm to 5:00pm.
Sincerely,
The School District of Philadelphia

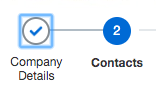
Step 1: Company Details
Enter basic information about your company and provide at least one contact. Complete the required information in the following fields:
Company Name: Provide the full legal name of your company. There is a field later in the process to enter any “DBA,” or “Doing Business As” names. This field should only be used to enter the full legal name of the company.
Tax Organization Type: Select your company’s tax organization type from the dropdown. Most companies will be “Corporation.” Note, LLC organizations should select “Corporation.” Charter schools and private schools should select “Non-Profit Organization.” Public school districts should select “Government Agency.”
Supplier Type: Select the supplier type from the dropdown that most closely matches your organization or company. Companies providing goods or professional services to the District should select “Supplier.”
Corporate Website: (Optional) Enter your company’s website domain starting with “www.”
Attachments: Ignore this.
DUNS Number: (Optional) Enter your company’s DUNS Number. Not every company has or needs a DUNS number. A DUNS Number is a unique nine-digit identifier for businesses assigned by Dun & Bradstreet. DUNS Numbers are often referenced by lenders and potential business partners to help predict the reliability and/or financial stability of the company.
Tax Country: Most companies should select “United States.” You can type in the first few letters, and it will display. If you are a foreign company, select from the list as appropriate.
Taxpayer ID: If you are an Individual, enter your social security number. If you are any other tax organization type, ignore this field.
Tax Registration Number: If you are any tax organization type other than “Individual,” enter your federal tax ID. If you are an Individual, ignore this.
Note to Approver: (Optional) If you want to provide a note for the School District, you can enter it in this field.
Your Contact Information: Provide the first name, last name, and email of the person who will be responsible for entering and updating your company information in the portal. This could be you or another person who will take responsibility for this information in the future.
Step 2: Contacts
Enter other contacts for your organization and assign them various roles and responsibilities. The more contacts we have with assigned roles, the better prepared we will be to work with your company.
The first contact for your organization has been imported from the contact information you gave on the first page under “Your Contact Information.” Click the Create button to enter additional contacts or on the Edit button to edit the existing contact.
Administrative Contact: If the contact person you are entering should be notified of the outcome of the registration request, select the Administrative Contact checkbox.
User Account: If the contact person you are entering needs to access the Supplier Portal, select the Request User Account checkbox.
Roles: If you selected the Request User Account checkbox on this contact, you must select the role assigned to the person. There are five options for roles (scroll down on the roles in the application to see all of them). Each role has a brief description of the access and responsibility it provides.

Step 3: Addresses
Enter your organization’s mailing addresses. After entering a mailing address, you can select the contacts you entered on the previous step that are associated with that physical address. Note: Enter at least one address for “Remit-To” and “Ordering” purposes.
Click the Create button to enter a new mailing address. The “Create Address” page displays.
Address Name: This should be used to categorize the address. The School District recommends the following:
- “Ordering,” if the address will be the destination for purchase orders,
- “Remittance,” if the address will be the destination for checks or payment, or
- “Main,” if it will be used for both.
Address Purpose: The “Address Purpose” field provides three checkboxes. Select the appropriate option. You can select more than one.
- “Ordering”, if this address should receive purchase orders. If you select this box, make sure to enter an email address for this address.
- “Remit To”, if this address should receive checks or other payments for services and/or goods provided.
- “RFQ or Bidding”, if this address should receive notifications of posted RFPs, RFQs, and bids, as well as other communication regarding solicitations and negotiations.
Do not select “Ordering” or “Remit-To” on more than one address.
Tip: You can complete the Postal Code field, press Enter, then select the code from the results. The City and State automatically populate.
Address Contacts: You can select contacts that you entered in Train Stop 2 and associate them with the address being entered. This is not mandatory but helps the School District contact the correct person when trying to reach your organization.
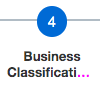
Step 4: Business Classification
This section collects information about the type of business you own, specifically if your company is certified as a disadvantaged business. If you do not qualify as a disadvantaged business, check the box that says “None of the classifications are applicable.”
Click on the Actions dropdown menu and select Add Row.
For businesses with certificates from certifying agencies on file:
Classification: Select the type of certification you have from the dropdown.
Subclassification: Some classifications have subclassifications. If the drop-down appears, select the appropriate subclass.
Certifying Agency: Select the agency that issued your certification. If the agency is not listed, select Other, and you will be prompted to enter the name in Other Certifying Agency.
Certificate: Enter the number listed on your certificate.
Start Date and End Date: Enter the dates listed on your certificate.
Attachments: Attach a copy of your certificate.
Notes: If you would like to leave a note regarding your classification, enter them here.
For businesses with no certifications on file:
Classification: Select the type of certification you have.
Subclassification: Some classifications have subclassifications. If the dropdown appears, select the appropriate subclass.
Certifying Agency: Select Other.
Other Certifying Agency: Enter “N/A”
Certificate: Enter “N/A”
Start Date and End Date: You can enter any dates in these fields.
Attachments: Attach any proof of your business classification that you can provide.
Notes: If you would like to leave a note regarding your classification, enter them here.

Step 5: Products and Services
This section allows you to select the products and/or services your company provides. This section is not mandatory, but it helps the School District reach out to your company when we release RFPs and bids for the services or goods your company provides.
To add a product or service, click the Select and Add button.
You can search for a category in the Category Name or Description field at the top of the page that appears. You can also browse through the list of products and services on that page.
To select a product or service, click the checkbox next to the Category Name or Number. To view more detailed products and services under the categories, click the arrow to the left of the Category Name or Number. Once you have selected the products and services you provide, you click Apply and OK at the bottom of the page.
You can remove any products or services from your list by selecting the Remove button on the right side of the Products and Services page.

Step 6: Questionnaire
This section collects important and required documentation from your business.
W9 Form: Upload a current and accurate W9 Form for your company. This form is required, and your registration request will not be processed without it. The name of the business you entered in Stop 1 must match the name of the business on the W9 form.
DBA Name: If your company operates under an alternate, or Doing Business As (DBA) name, enter it here.
Title of Legally Authorized Representative: Please enter the title of the person who is legally authorized to sign contracts on behalf of your organization.
Name of Legally Authorized Representative: Please enter the name of the person who is legally authorized to sign contracts on behalf of your organization.
Email Address of Legally Authorized Representative: Please enter the email address of the person who is legally authorized to sign contracts on behalf of your organization.
City of Philadelphia Tax Clearance Certification: Upload a City of Philadelphia Tax Clearance Certification for your company here. Note that this is mandatory to do business with the School District of Philadelphia.
https://www.phila.gov/services/payments-assistance-taxes/get-tax-clearance/
State of Incorporation: Enter the state that your organization is incorporated in here.

Step 7: Review
Congratulations, you’re almost there!
Before submitting, review all the information you entered. Make sure it is accurate and complete.
Once you’ve reviewed all the information and have ensured its accuracy, select the Register button to submit the registration request to the School District of Philadelphia. Your request will be reviewed by School District personnel, who may reach out to you with questions or additional instructions. You will receive a notification if your application has been approved.
Your registration is complete. Thank you.